I am happy owner of Das keyboard Model S Ultimate for a long time and wanted to do this for more than year. Finally time had come!
Introduction
I really like mechanical keyboards and mine with Cherry MX blue switches is really awesome. Even sound is pretty rad, sounds like skeletons having sex. However, there was one problem. I am avid keyboard shortcuts user and bottom left had this layout:
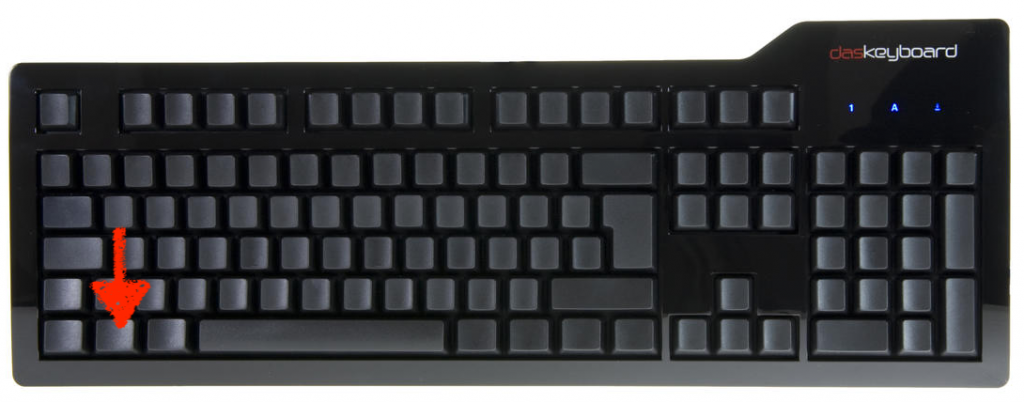
From bottom left there was CTRL – FN (red arrow)- SUPER – Spacer. To match Macbook keyboard layout on right side I switched CMD key and ALT key in keyboard settings so no problem here. However FN key is used to switch multimedia keys which I do not use and what sucks FN key does not send scancode, meaning this key can’t be remapped to ALT on operating system level.
Well, what can’t be fixed using software can always be fixed hardware way. Since I like to approach things with customize everything mindset all I had to do was hardwire left FN key to right super key which is remapped to ALT in MacOS.
How to
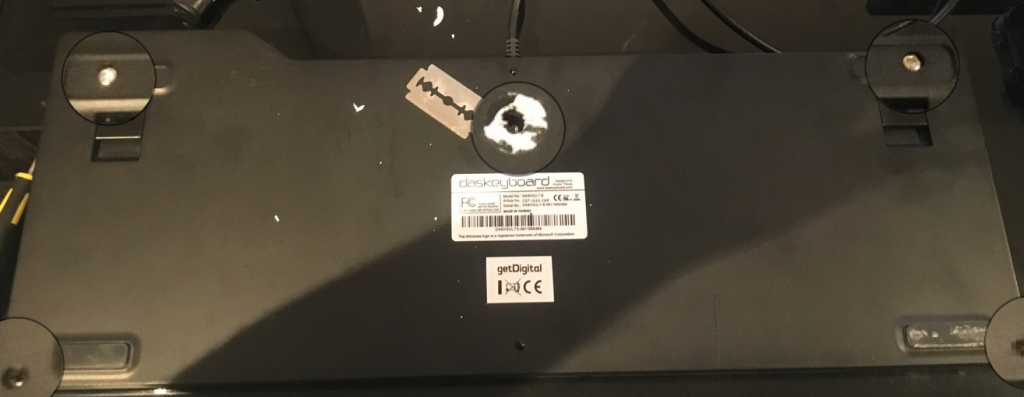
For this hack I needed soldering set, screwdriver, few centimers of wire and circa 30 minutes. First I had to unscrew screws on bottom of keyboard.
Then I had to remote top cover of keyboard. I do not have photo of this step but I recommend after unscrewing to grab a keyboard, start from top left. Keyboard is assembled with with 8 clips. Two are on top, one on left and right and four on bottom. How I did this is by bending and removing. All it take is patience and sensitivity. They work by sliding in bezel side inside tray. You will end with something like this:
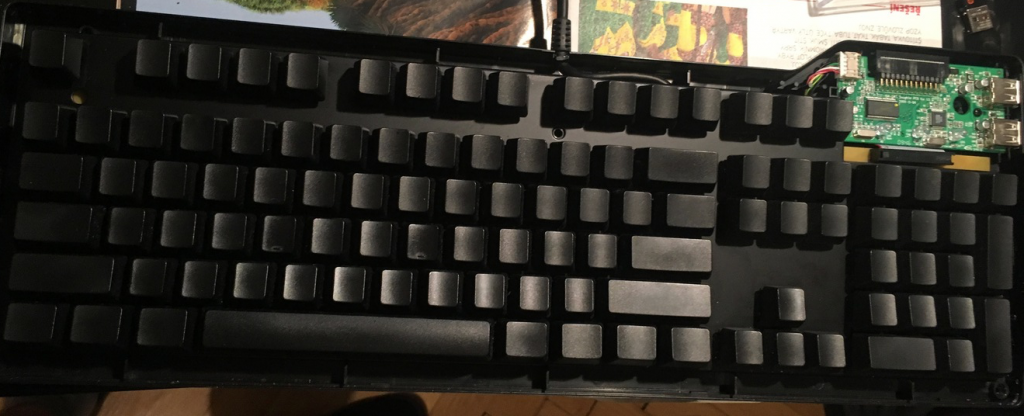
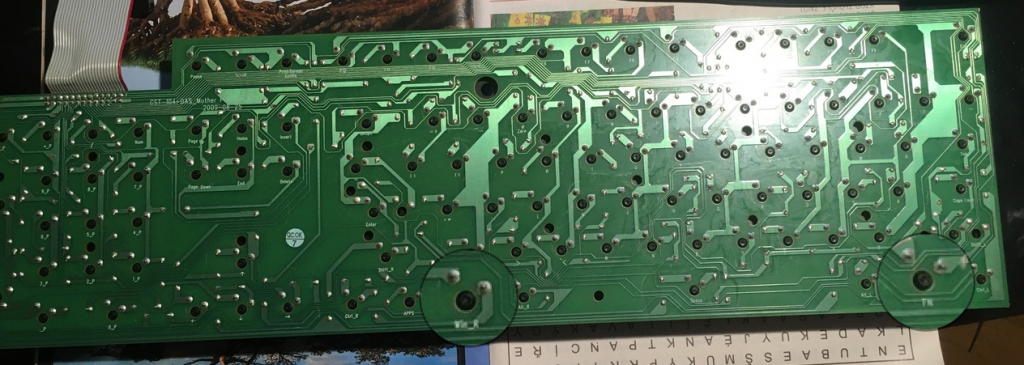
I unscrewed two screws holding microcontroller and keyboard is free. You can remove PCB from tray. It looks like this (when you turn it to key down position):
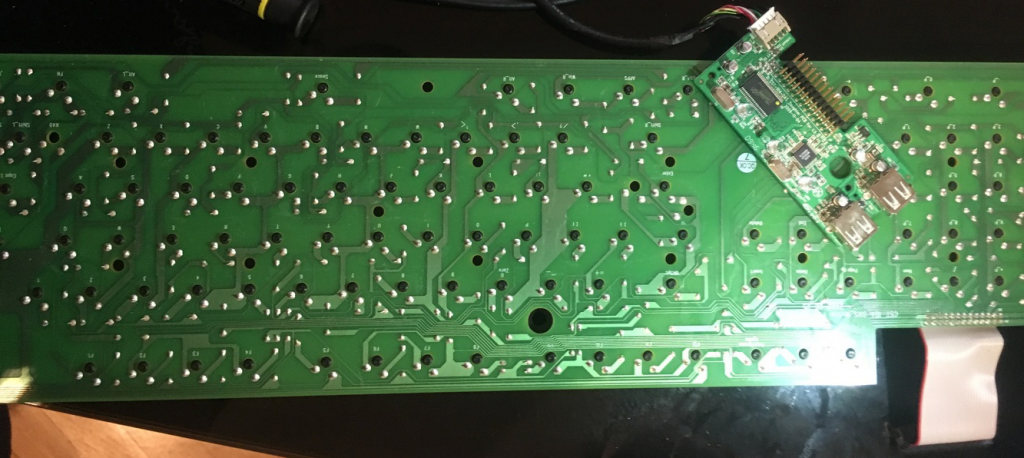
Obviously, remove microcontroller (on previous picture I already did it) and fun part begins. I had to solder FN which is now on right side (keyboard is in key down position and Super key (WIN_R).
BTW Das keyboard engineers did good job in design of PCB, description and overall job. Kudos!
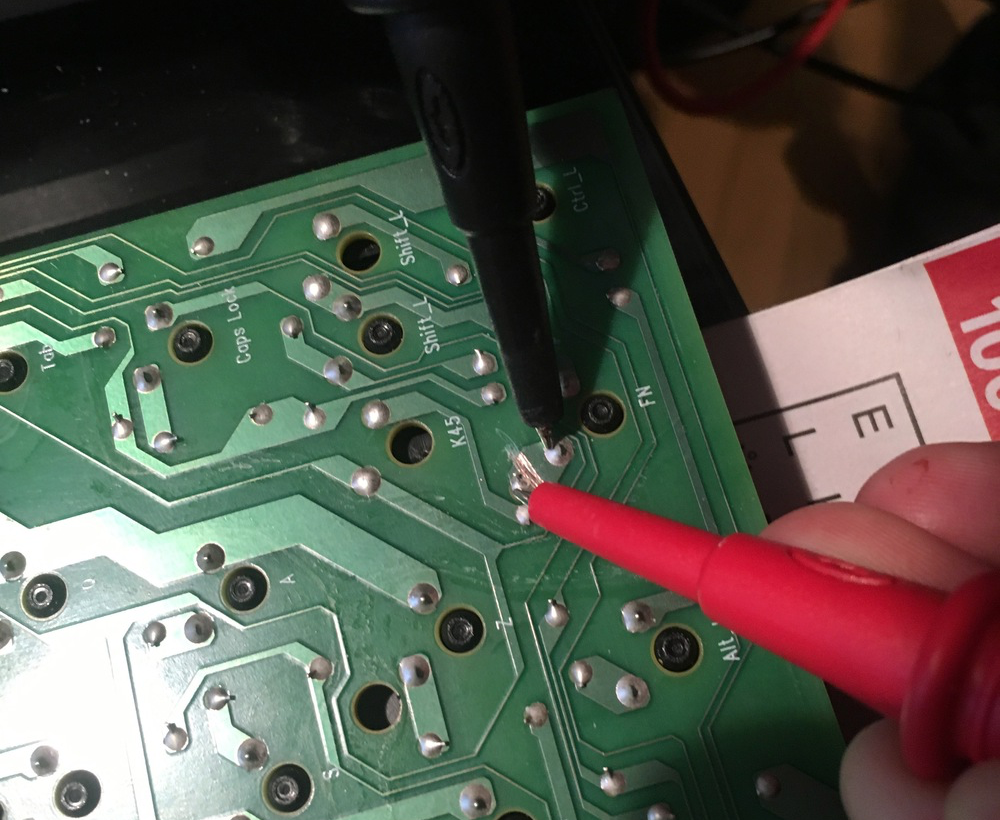
First, before I started solder I had to cut electrical paths in FN key. I did using carpeting knife (so much to sophisticated tools) and scratching. End result looks like this:
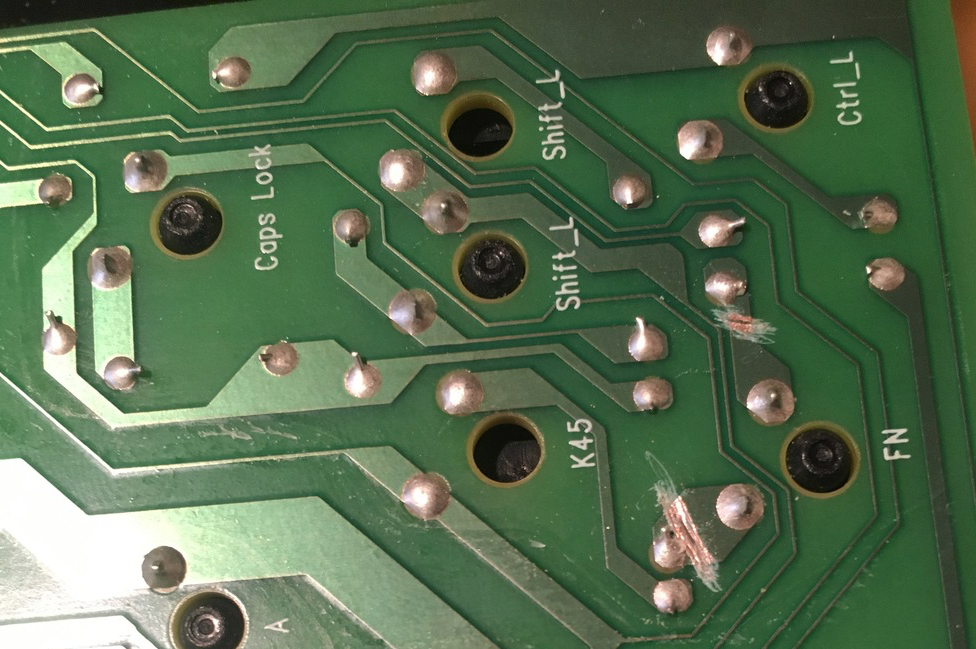
Good way how to definitely check you interrupted electrical paths is using multimeter and beeping function. If multimeter is beeping keep scratching paths. I did not wanted to interrupt some paths on other side of PCB (more things to solder).
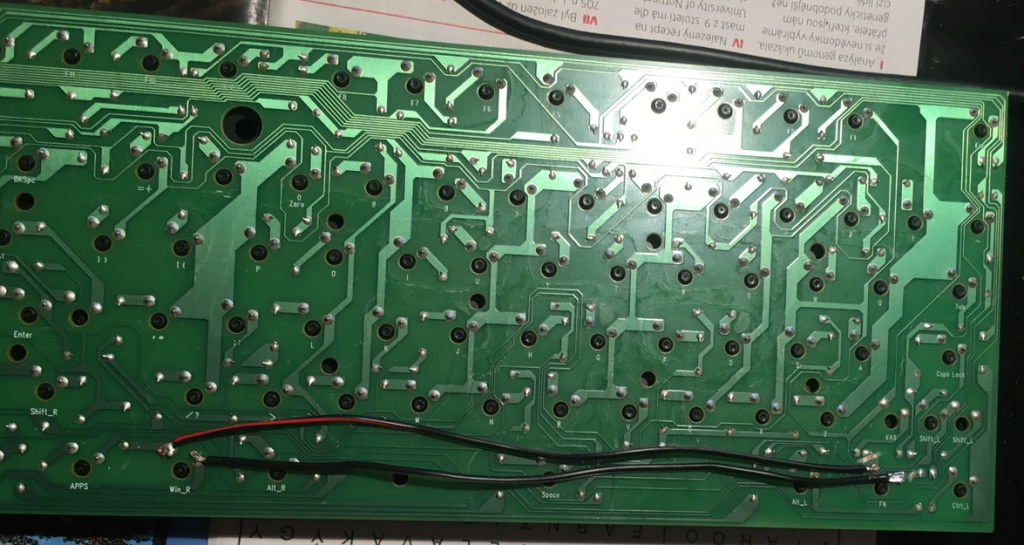
Soldering part begins. I used two random wires I found in some box. This is how end result looks like:
Assembly process is reversed dissasembly, no need to cover it.
Conclusion
As a avid keyboard shortcuts user (I hate to grab mouse, it slows me way too much), I have to say keyboard works as I wanted to. Nothing is broken, no problems.
I think I have to learn to make better pictures when documenting what I do. As always – customize everything approach wins.