_hacks – jozefmares.com
Home top_menu _hacks
Category:

_hacks

Encountering a DHCP error on your Mac can be a frustrating experience, as I know from personal experience. I spent several Saturday hours trying to debug issues with my network. In this article, we’ll go over some common reasons why you might not be getting an IP address from your DHCP server on macOS, and how you can troubleshoot and fix the issue.

The symptoms of the problem typically involve your Mac using a self-assigned IP address instead of obtaining one from the DHCP server. I initially thought that the issue might be with my network setup, which includes a gateway device (based on Turris Omnia), VLANs, firewalling, a switch, and a dedicated AP connected to the switch. There are many moving parts in such a setup, so there were plenty of opportunities for things to go wrong.

To diagnose the issue, I checked the logs on the gateway device and found repeating messages indicating that DHCP offers were being sent but no DHCP requests were being received.

Apr 2 13:04:23 gw dnsmasq-dhcp[5085]: DHCPDISCOVER(lan0.150) --REDACTED_MAC--
Apr 2 13:04:23 gw dnsmasq-dhcp[5085]: DHCPOFFER(lan0.150) --REDACTED_IP-- --REDACTED_MAC--.

I used TCPdump to capture the traffic and confirmed that there were no DHCP requests being sent by my Mac.

tcpdump -i lan0.150 port 67 or port 68

13:34:55.138920 IP 0.0.0.0.68 > 255.255.255.255.67: BOOTP/DHCP, Request from --REDACTED_MAC-- (oui Unknown), length 300
13:34:55.139467 IP 192.168.150.1.67 > 192.168.150.3.68: BOOTP/DHCP, Reply, length 311
13:35:03.421299 IP 0.0.0.0.68 > 255.255.255.255.67: BOOTP/DHCP, Request from --REDACTED_MAC-- (oui Unknown), length 300

Just for the unitiated, here is how proper DHCP communication looks like:

CLIENT -> DHCPDISCOVER
SERVER -> DHCPOFFER
CLIENT -> DHCPREQUEST
SERVER -> DHCPACK

Manually setting the IP address confirmed that the network was working, which meant that the issue was with macOS.

Further investigation using the Console app revealed an error log related to DHCP, indicating that my Mac was stuck in the “INIT waiting” state.

DHCP en0: INIT waiting at 4 for 4.107551

After searching online (for example here or here, I found similar issues reported by other users, which led me to suspect that the network cache on my Mac was corrupted. But before that I fiddled for another two hours with networking because I ignored info I already found. :)

One common cause of DHCP issues on macOS is a corrupted network cache. This can occur due to outdated or conflicting network configurations, previous network connections that were not properly closed, or a malfunctioning network daemon. To troubleshoot this issue, you can try resetting your network configuration and cache by running the following commands in Terminal:

sudo dscacheutil -flushcache 
sudo killall -HUP mDNSResponder

If resetting the network configuration doesn’t work, you can try updating your macOS to the latest version, which may include bug fixes related to networking.

In my case, I had an update pending, so I triggered it and rebooted my Mac. After the update, everything worked correctly. I assume that there was something wrong with the network daemon, and the update triggered a cache flush, which resolved the issue.

In conclusion, encountering a DHCP error on macOS can be frustrating, but with a little troubleshooting, you can usually fix the issue. Remember to check your network configuration, reset your network cache, and update your macOS to the latest version. If all else fails, booting into single-user mode can help you diagnose the issue further.

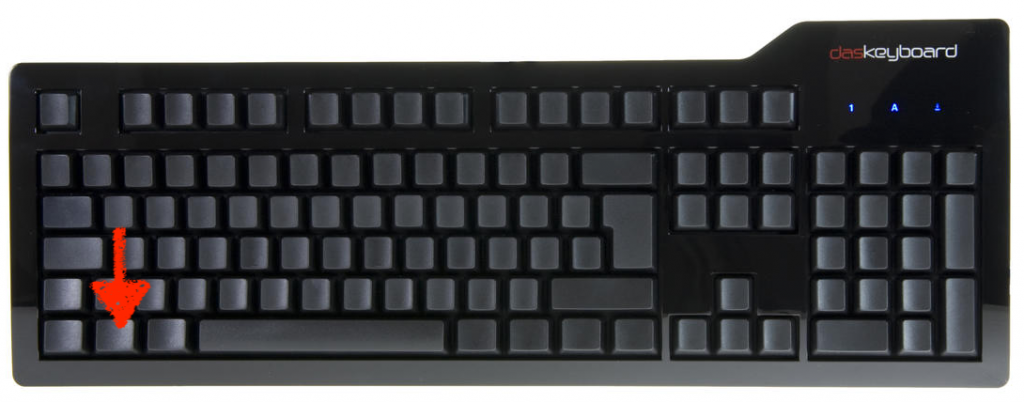
I am happy owner of Das keyboard Model S Ultimate for a long time and wanted to do this for more than year. Finally time had come!

Introduction

I really like mechanical keyboards and mine with Cherry MX blue switches is really awesome. Even sound is pretty rad, sounds like skeletons having sex. However, there was one problem. I am avid keyboard shortcuts user and bottom left had this layout:

From bottom left there was CTRL – FN (red arrow)- SUPER – Spacer. To match Macbook keyboard layout on right side I switched CMD key and ALT key in keyboard settings so no problem here. However FN key is used to switch multimedia keys which I do not use and what sucks FN key does not send scancode, meaning this key can’t be remapped to ALT on operating system level.

Well, what can’t be fixed using software can always be fixed hardware way. Since I like to approach things with customize everything mindset all I had to do was hardwire left FN key to right super key which is remapped to ALT in MacOS.

How to

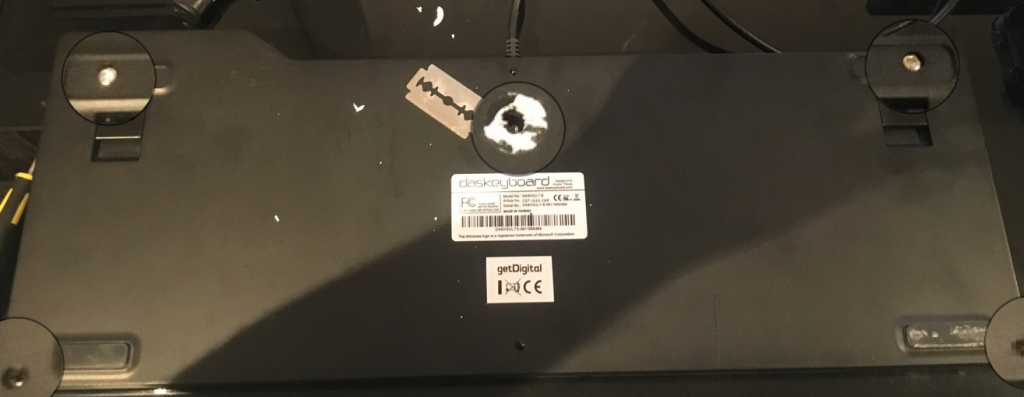
For this hack I needed soldering set, screwdriver, few centimers of wire and circa 30 minutes. First I had to unscrew screws on bottom of keyboard.

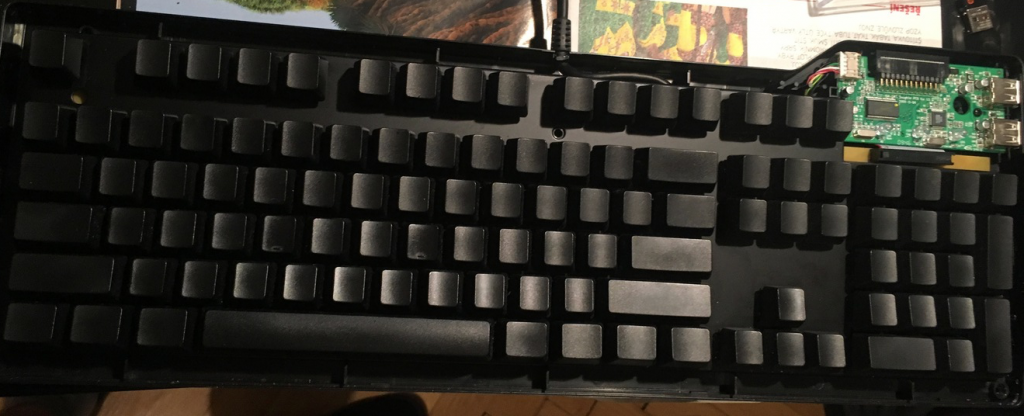
Then I had to remote top cover of keyboard. I do not have photo of this step but I recommend after unscrewing to grab a keyboard, start from top left. Keyboard is assembled with with 8 clips. Two are on top, one on left and right and four on bottom. How I did this is by bending and removing. All it take is patience and sensitivity. They work by sliding in bezel side inside tray. You will end with something like this:

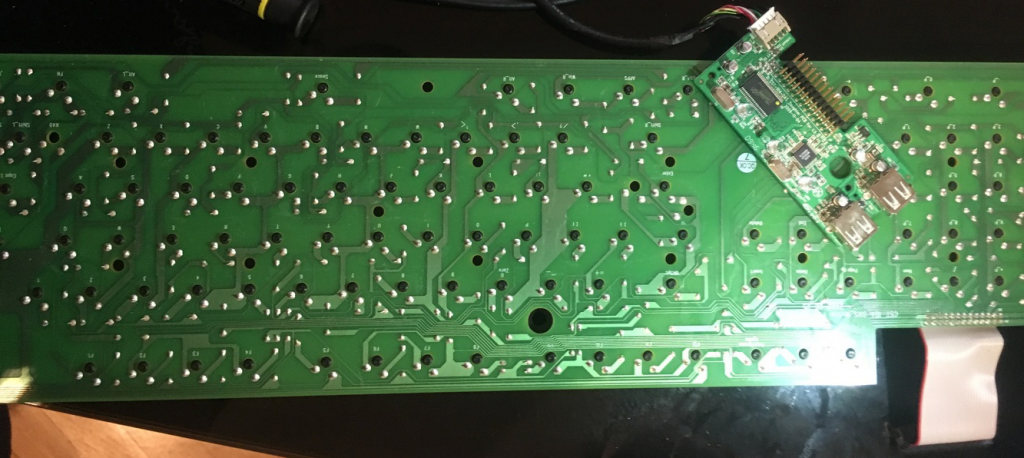
I unscrewed two screws holding microcontroller and keyboard is free. You can remove PCB from tray. It looks like this (when you turn it to key down position):

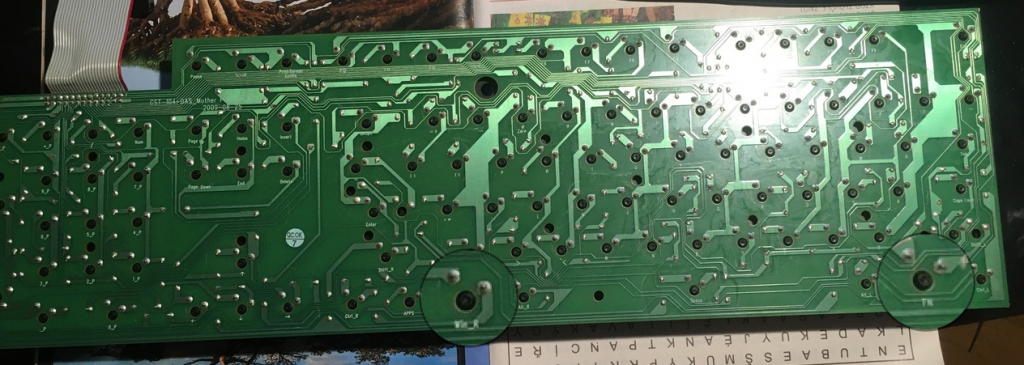
Obviously, remove microcontroller (on previous picture I already did it) and fun part begins. I had to solder FN which is now on right side (keyboard is in key down position and Super key (WIN_R).

BTW Das keyboard engineers did good job in design of PCB, description and overall job. Kudos!

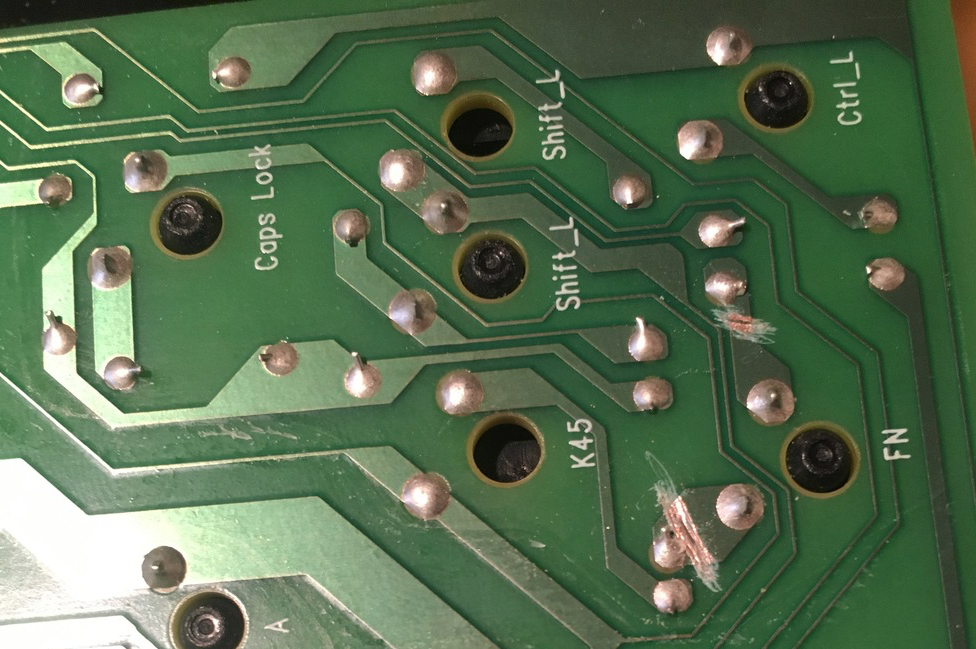
First, before I started solder I had to cut electrical paths in FN key. I did using carpeting knife (so much to sophisticated tools) and scratching. End result looks like this:

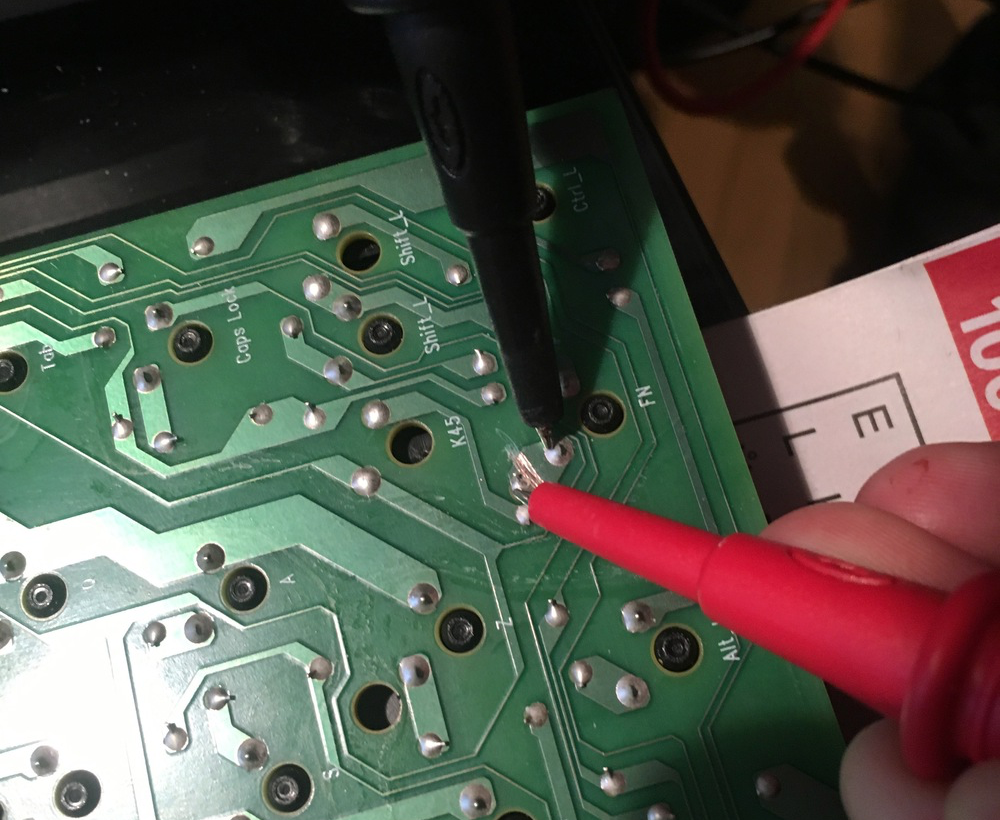
Good way how to definitely check you interrupted electrical paths is using multimeter and beeping function. If multimeter is beeping keep scratching paths. I did not wanted to interrupt some paths on other side of PCB (more things to solder).

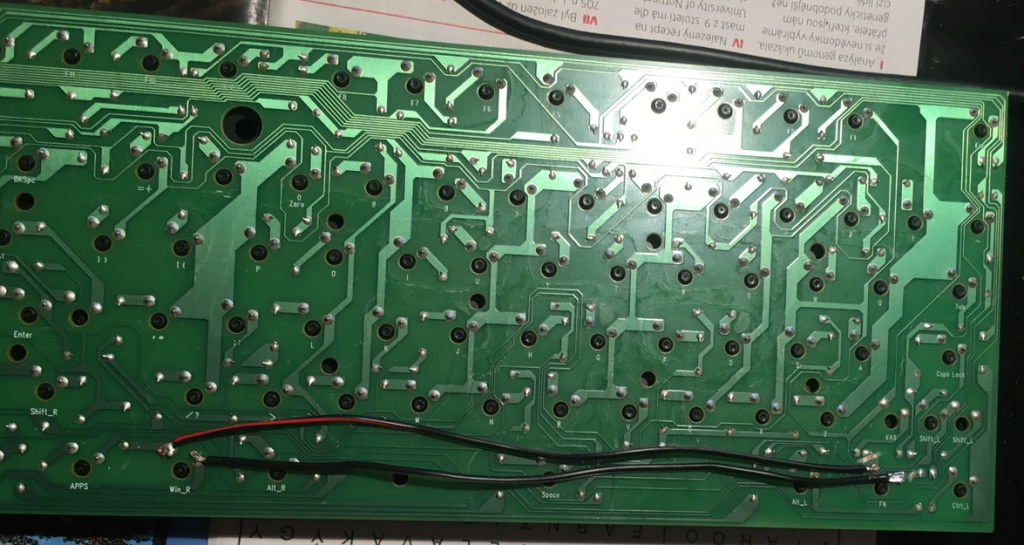
Soldering part begins. I used two random wires I found in some box. This is how end result looks like:

Assembly process is reversed dissasembly, no need to cover it.

Conclusion

As a avid keyboard shortcuts user (I hate to grab mouse, it slows me way too much), I have to say keyboard works as I wanted to. Nothing is broken, no problems.

I think I have to learn to make better pictures when documenting what I do. As always – customize everything approach wins.

I needed to migrate Linux RAID partition (originating from Synology NAS) to new disk and I needed to do it under OS X.
With VMware Workstation this was not big deal, but seems like this is not possible from Fusion user interface.

Required steps

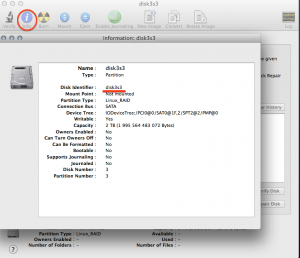
    1. Get name of device (use diskutil list or under Disk utility).screenshot_os_x_diskutil
    2. Start terminal (in Applications/Utilities).
    3. Change current working directory to WMware Fusion folder:
cd "/Applications/VMware Fusion.app/Contents/Library/"
    1. Create VMDK file which will be linking our real, raw device:
./vmware-rawdiskCreator create /your/device fullDevice ~/your-device ide
    1. Next, we need to go to folder where are virtual machines stored (usually Documents/Virtual Machines – in my case dedicated RAID drive).
    2. Find relevant virtual machine, click Show Package Contents.
    3. Move created file (your-device.vmdk) to opened folder.
    4. Open in favorite text editor machine_name.vmx and append:
ide1:1.present = "TRUE"
ide1:1.fileName = "your-device.vmdk"

You should be able to mount device under desired guest. I utilized this method to migrate data from RAID partition to USB drive during big clean-up and consolidation :).

Other small lessons learned

  • To make USB drive works as USB3 device you need at least kernel 3.2.
  • USB3 is really fast and stable, even under VMware Fusion.
  • Journaled HFS works very well under Linux, but you need to mount it with -o force,rw.
Newer Posts